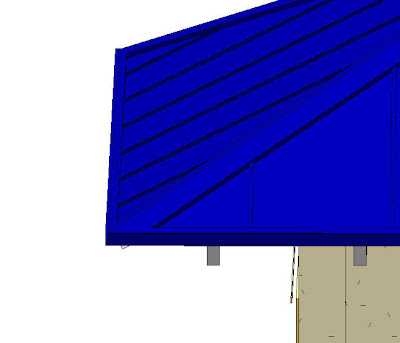
Here is a trick to create the look of a true standing seam metal roof in Revit.
First start by creating the roof with generic roofs that are thin I use 2". I was then able to duplicate each of my roofs in their same locations. I changed one of my roof types to "slopped glazing", this is a roof type that is a curtain system.
Second I set up our roof types. Start with the easy one, customized the type "Generic 2 inch" to "Seams" with correct material settings for the metal roofing (we will come back to this roof later). Then "Sloped Glazing" to "Metal Roof", this one will take some modifications. You will need to created a curtain panel that is 1/4" thick to use for the main field of the metal roof. We will also need a profile shape that is the size and shape of our standard field seams. I used a simple rectangle with type parameters to adjust width and height as needed. Then go to your new "Metal Roof" type and edit the type properties. Set Grid 1 Pattern to spacing for seams. Set Grid Mullions - Interior Type to Metal Roof Seam Profile. (You may have to adjust the profile insertion location up and down to have it site on top of the roof.
Now you should have two roofs with in each other. The final touch was to use "Opening by Face" tool on each of the roof faces or the Seams roof "the basic roof" to cut out for the Metal roof to show through. This will give you both the seamed in-field and the ridge/hip/valley pieces.


 I had the opportunity to poll a large group of users on the new interface and talk about, thank you JAG User Group. I showed Word 2007 first and asked if anyone ahas used the new 2007 Office product line, about a third of the group now uses it or has used it. Their opinion was "I can not find anything." I asked was there any other opinions, several people spoke up and said that once they got use to using it it was easier to use and quick to find things.